There’s a few tools you’ll have to get:
- brayer
- ink knife
- ruler
- spray bottle
- stamp
- glass
The brayer (and the ink) is the most expensive part. I bought a putty knife at the hardware store and a cheap photo frame that I took the glass panel out of. A good brayer really makes a difference.
I put a silicone baking mat under the glass. This keeps it in place and protects the surface beneath from ink.
There are also a few consumables you need:
- masking tape and pen/pencil, or tailor’s chalk
- ink (fabric, block printing)
- the fabric you want to print on
For the ink I use Speedball block printing fabric ink. This cleans up easily with soap and water. Other oil based inks should work just as well, but might require solvents for cleanup.
I have used different types of fabric. Woven cotton (not stretchy) works best. Knit cottons and polyesters work fine too, but take the ink just a little less well. Dark inks on light fabrics work best, but light inks on dark fabrics also work okay.
To be able to mix most colours, I have bought cyan, magenta, yellow, white and black. I later also bought red, as mixing to get red didn’t produce a very vivid colour.
Lastly, you’ll need some cleaning supplies:
- dish soap
- tub
- sponge or fabric scrap
- old towel
I keep a tub of soapy water nearby so I can start cleanup immediately after I’m done a stamp. I have a dedicated rag to dry the tools with.

Stamps
I print my stamps with PLA or PETG. I prefer to use a filament colour that’s not the colour of the ink I’m planning to use, so I can better see what parts of the stamp have not been coated yet. I also like to avoid dark colours as these are quicker to warp if they have accidentally been left in the sun.
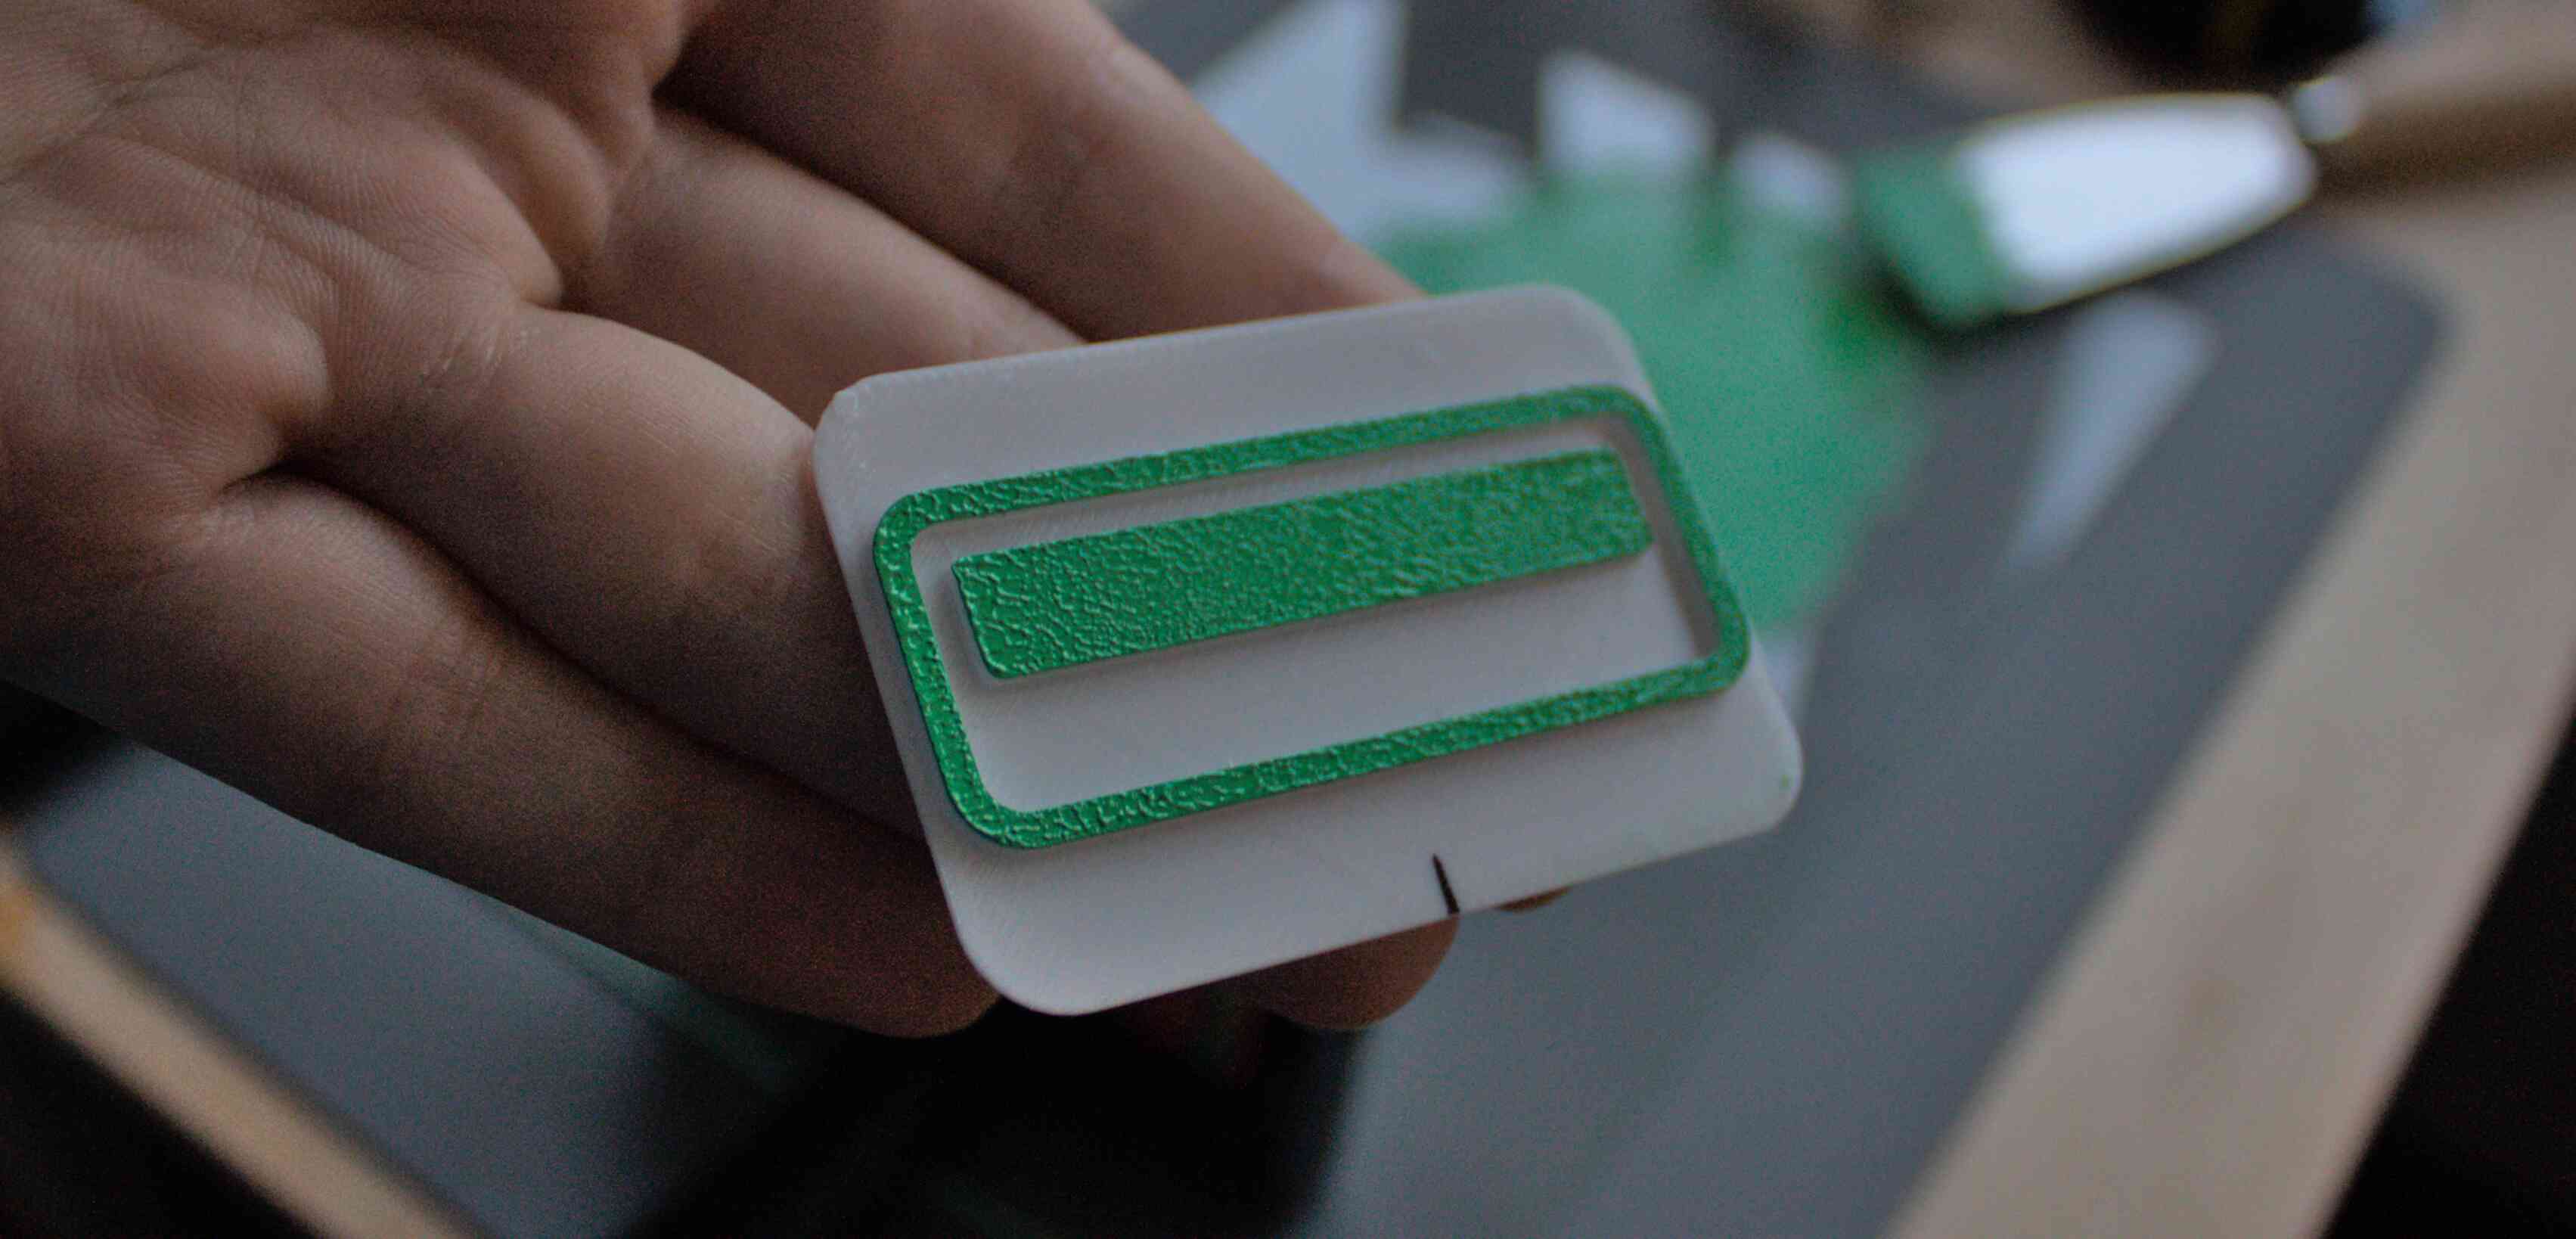
For the back plane of the stamp I use a thickness of 1mm, and for the raised part I use 1.5mm (so the top is 2.5mm high). These values may be optimized further to be more efficient.
I prefer to edit my designs in SVG, giving the relevant objects the right ID values so OpenSCAD will easily import them.
For inspiration or ready to print stamps, see the stamps/stencils repository on git.rebelbits.nl
Preparation
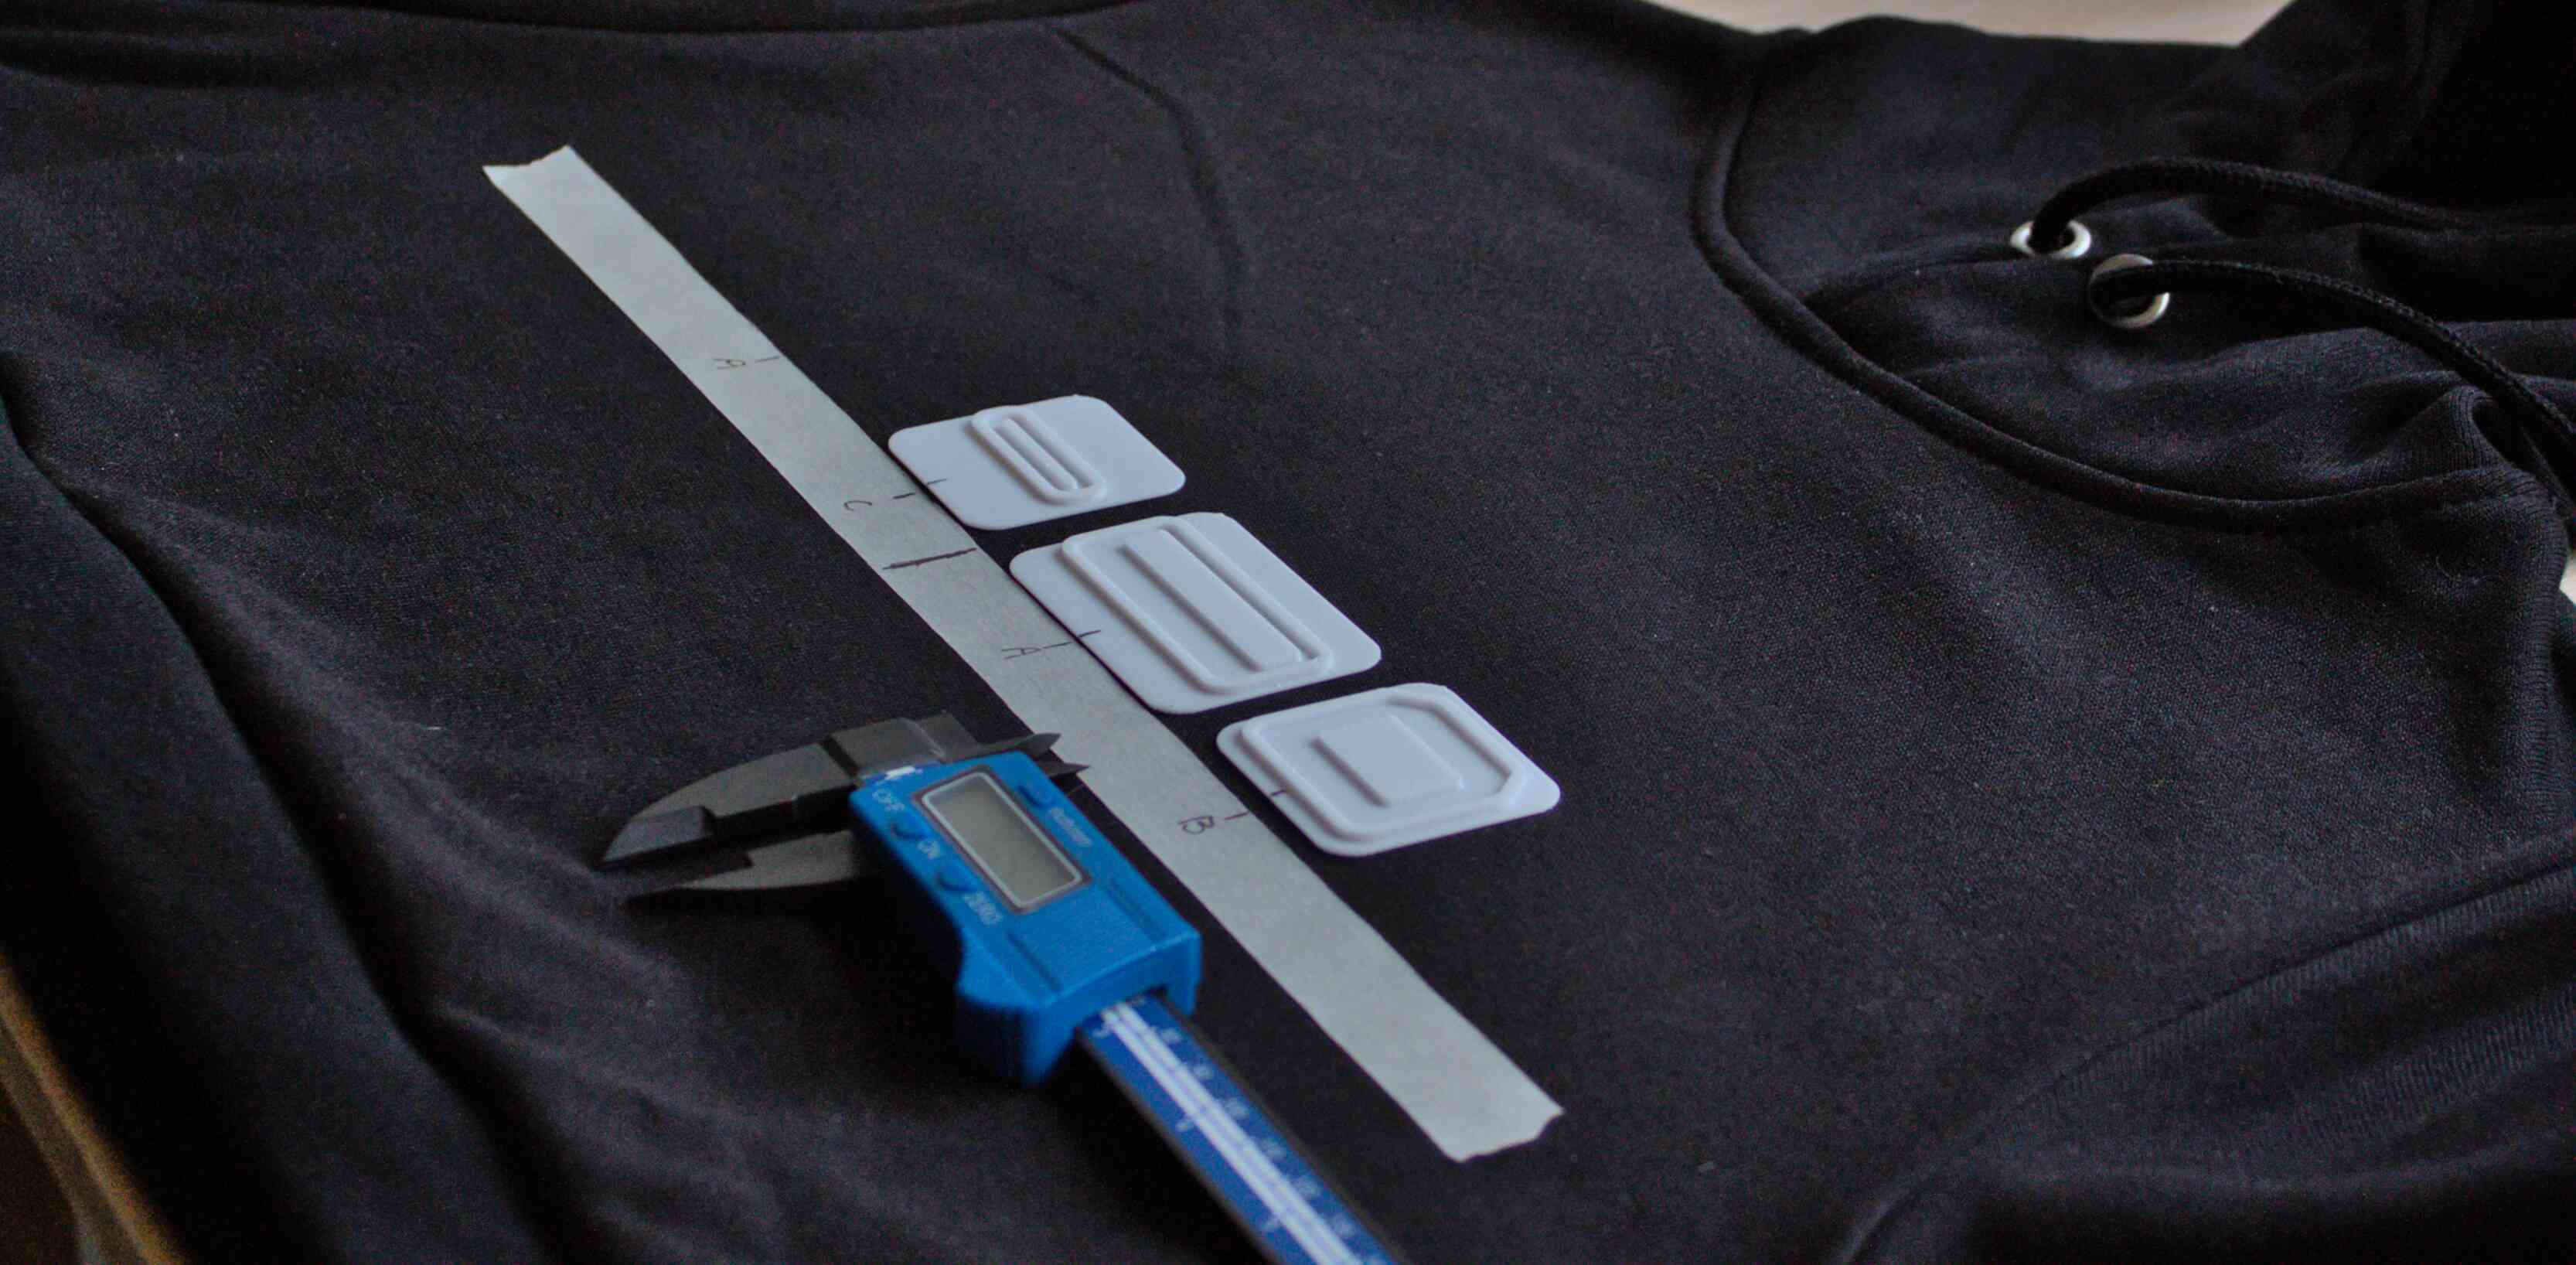
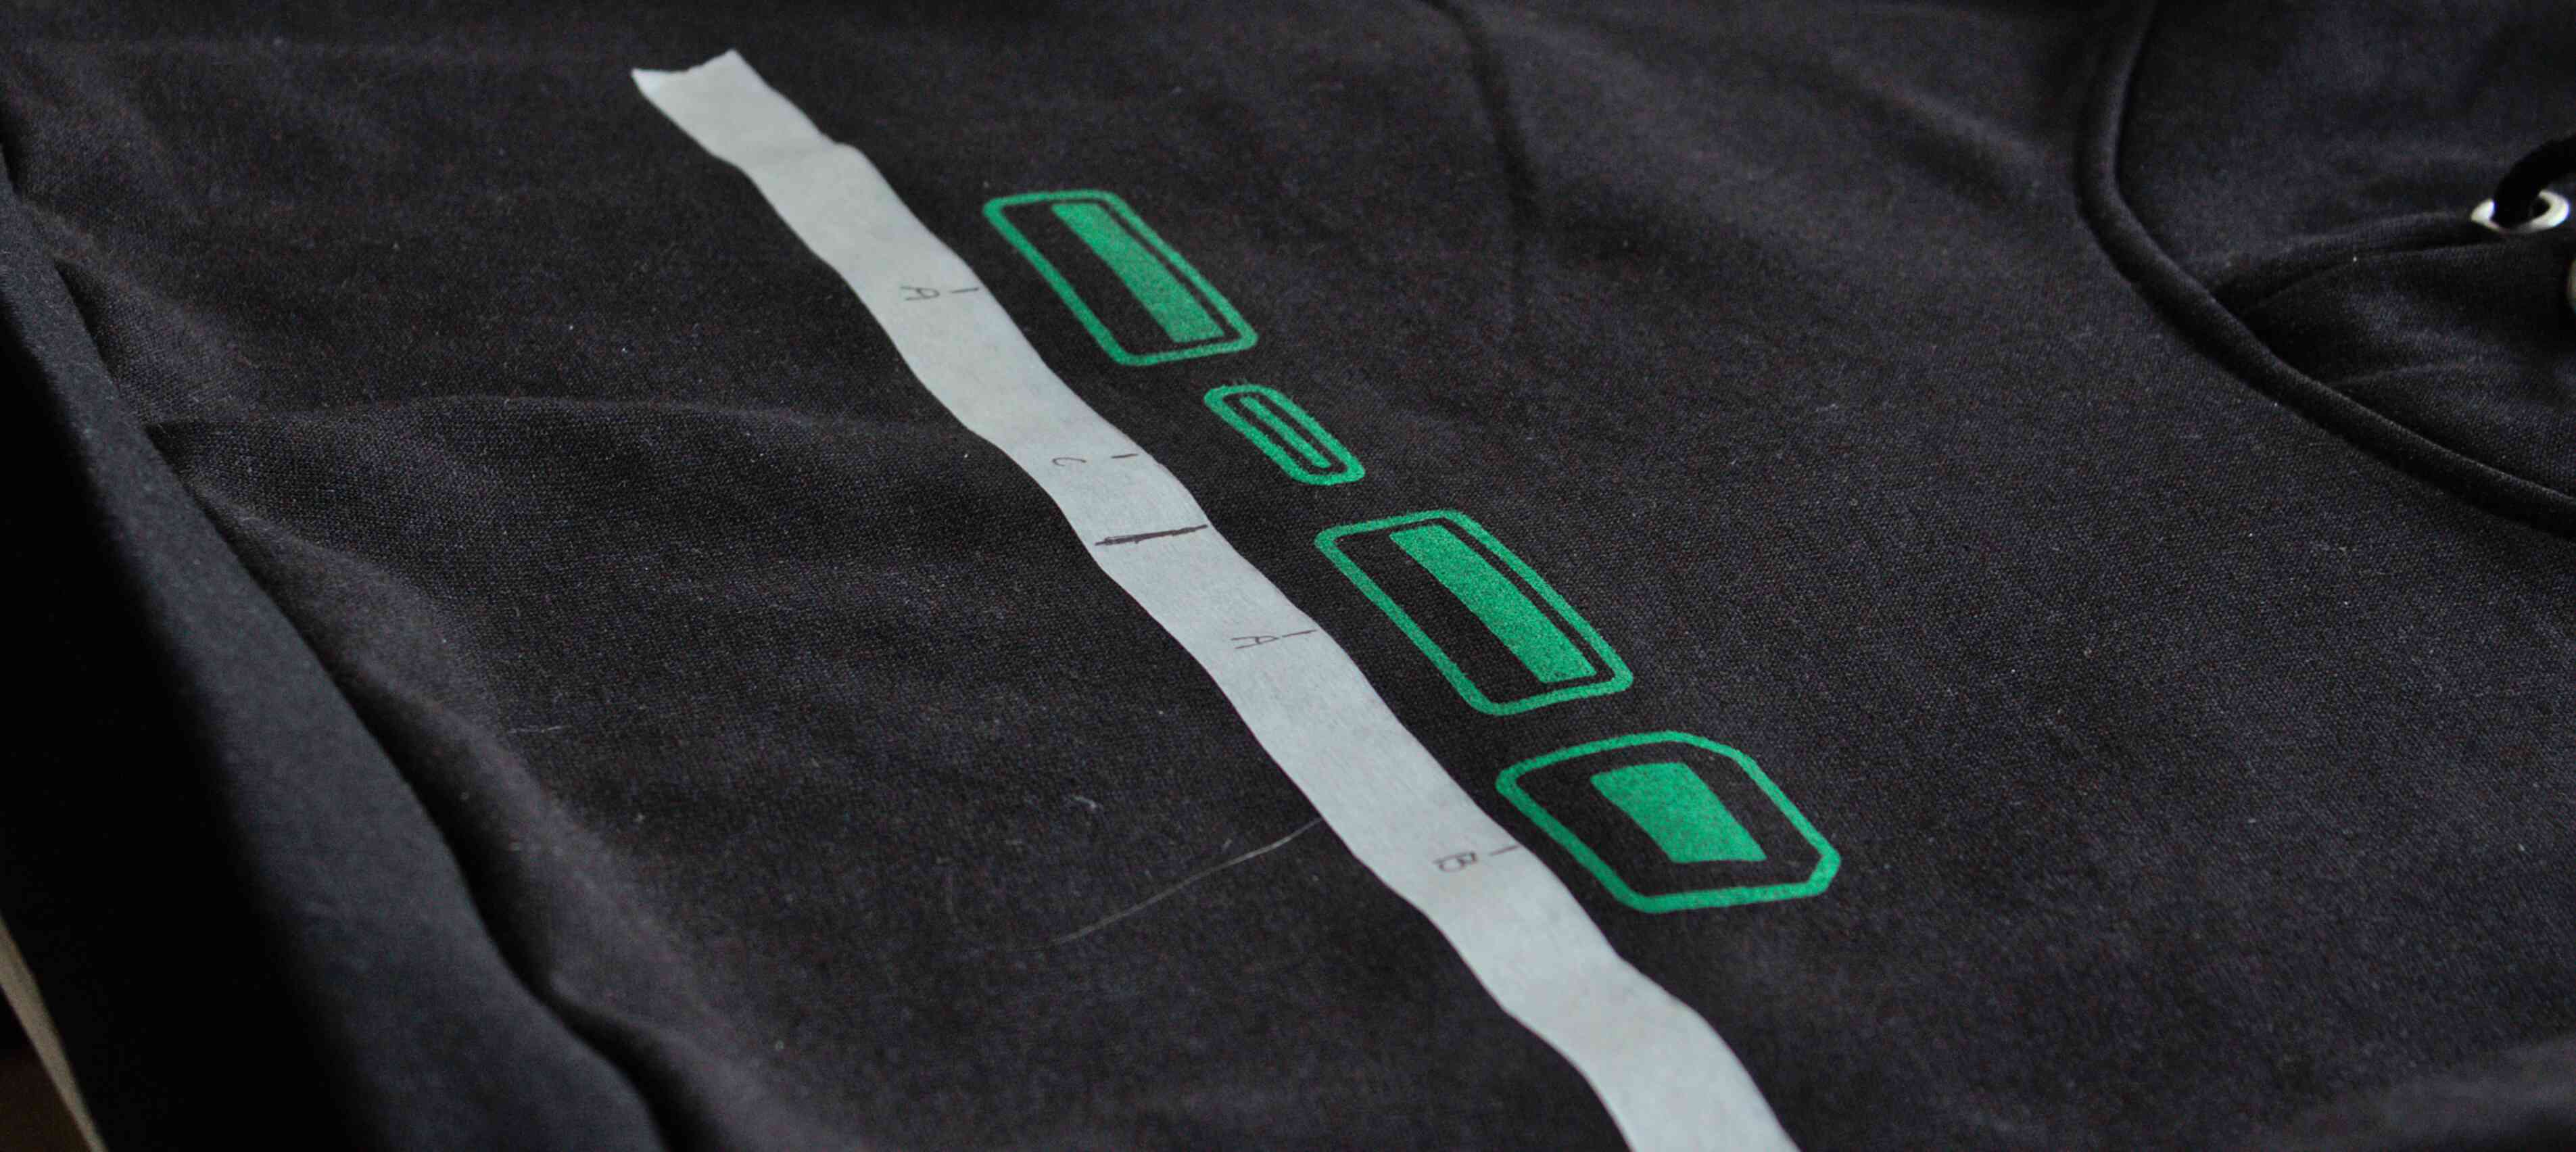
For preparation I put a thin piece of cardboard underneath the to-be-printed area so the ink won’t leak onto the fabric below it. I try out where I want the print to go, and then mark that location with masking tape and a pen, or with tailor’s chalk. For complex multi-colour prints it is very helpful to have these registration points on each stamp (a hole in the back of of the stamp, for example. Or a pen mark in the middle for simpler stamps) so you can see where every piece has to go.
Lastly I make the fabric just a little damp with a spray bottle so the ink will settle better.
Printing
Squeeze out your ink and mix it. Even if you’re not mixing colours. The ink may separate a bit in the tube, mixing gets it nice and smooth again.
Roll out your ink. This is much the same as you would do for lino on paper, but you will want to use a bit more ink. As you keep rolling, the sound of the brayer changes, getting more sharp and loud. Roll the ink onto the stamp, being careful that the stamp may stick to the brayer. If you get ink on the part of the stamp that isn’t debossed, just wipe it off with a slightly soapy rag. If you do, don’t stamp before you’ve put on a last good coating. It’s okay if the ink looks more ‘orange peel’ than it would for block printing on paper.
Press the stamp in the right place. Use your fingers to apply heavy pressure over all parts of the stamp, and take this moment to check if you have any ink on your fingers. Carefully lift the stamp up starting at one side. It will stick to the fabric a bit.
Tips and tricks
You can try rolling out two inks in parallel, creating a gradient. Getting this right is a little tricky, but can result in a super cool look!